

Video Tutorial:
For those who don’t want to watch the video, you can continue reading the article below.
-
How to Add Facebook and Google Login to WordPress Website
Add Facebook and Google login to WordPress website in just a couple of easy steps. So let’s get started!
-
Adding Google Login in WordPress
Step 1: Install and activate the plugin Super Socializer.
Step 2: Go to Super socializer > Social login then find master control after that click on enable social login.
Step 3: You will see this and click on save changes.
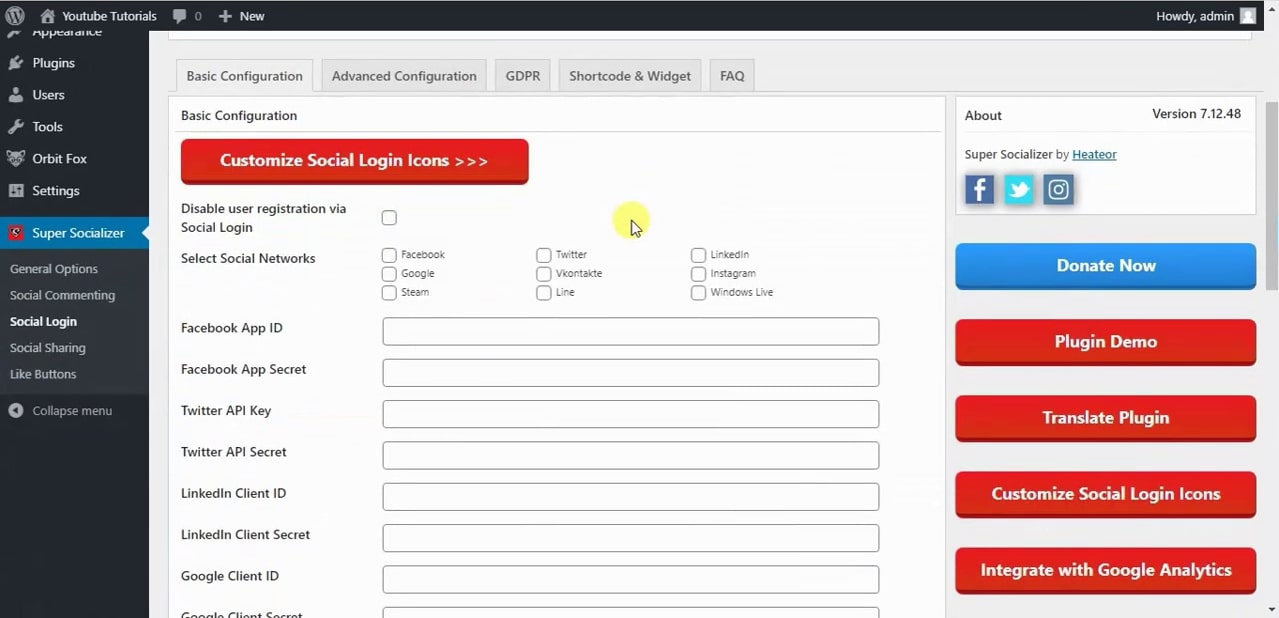
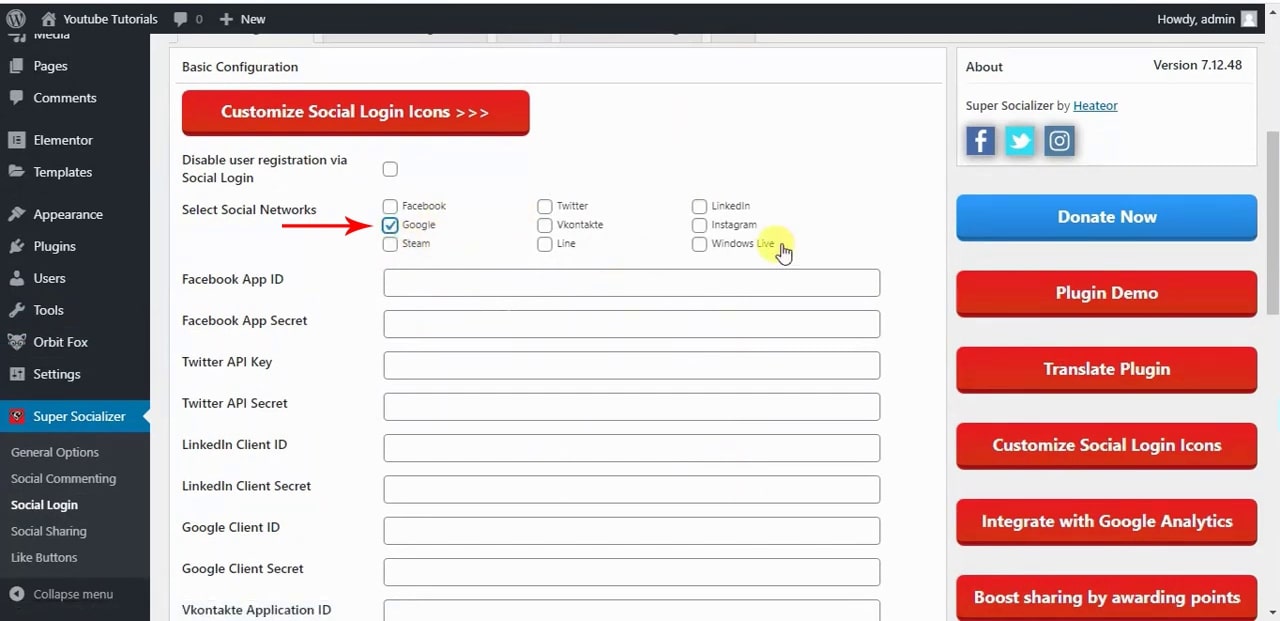
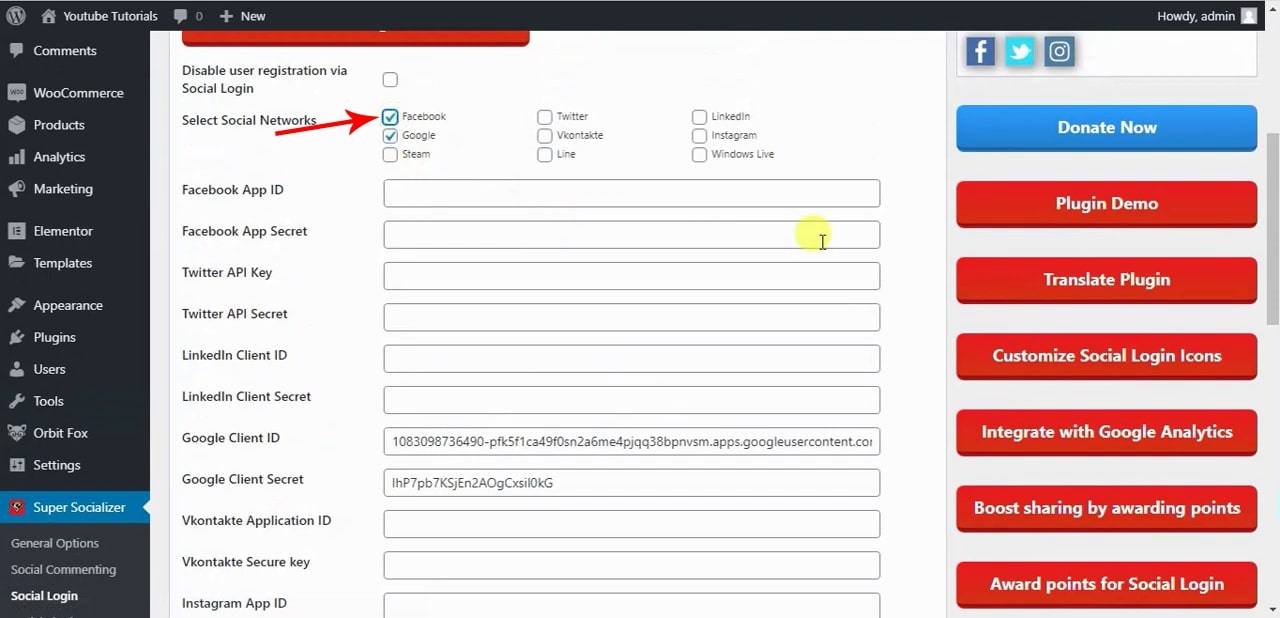
Step 4: Now we are going to make Google login for this select social networks and make check on Google as given below.
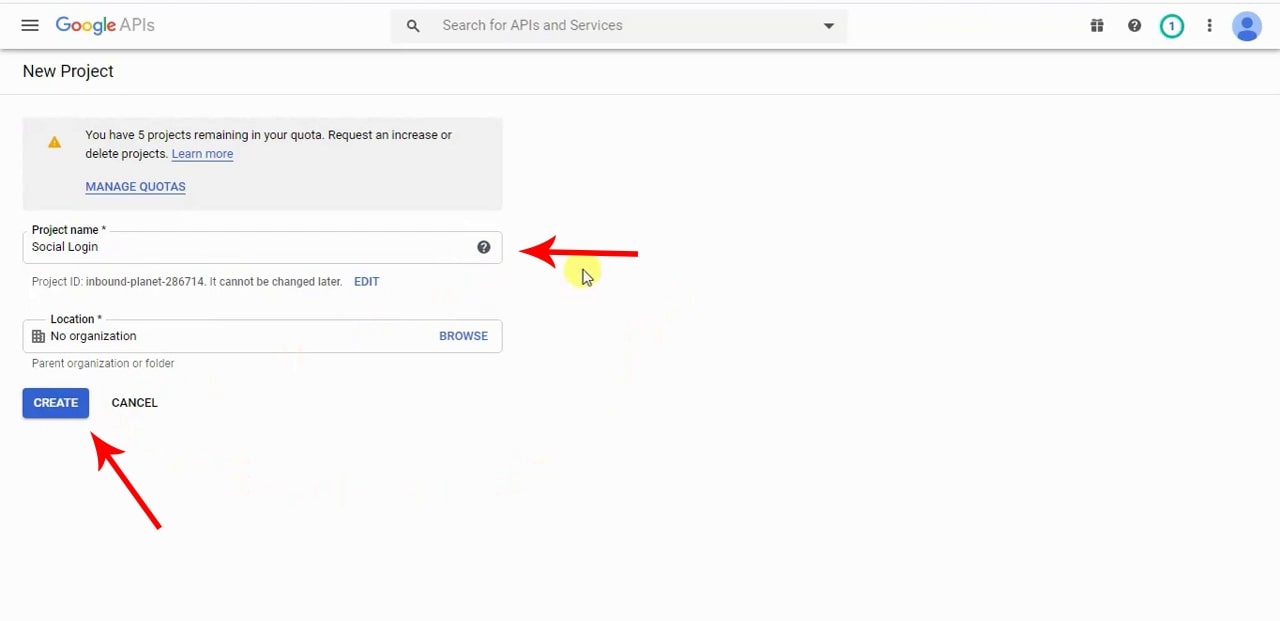
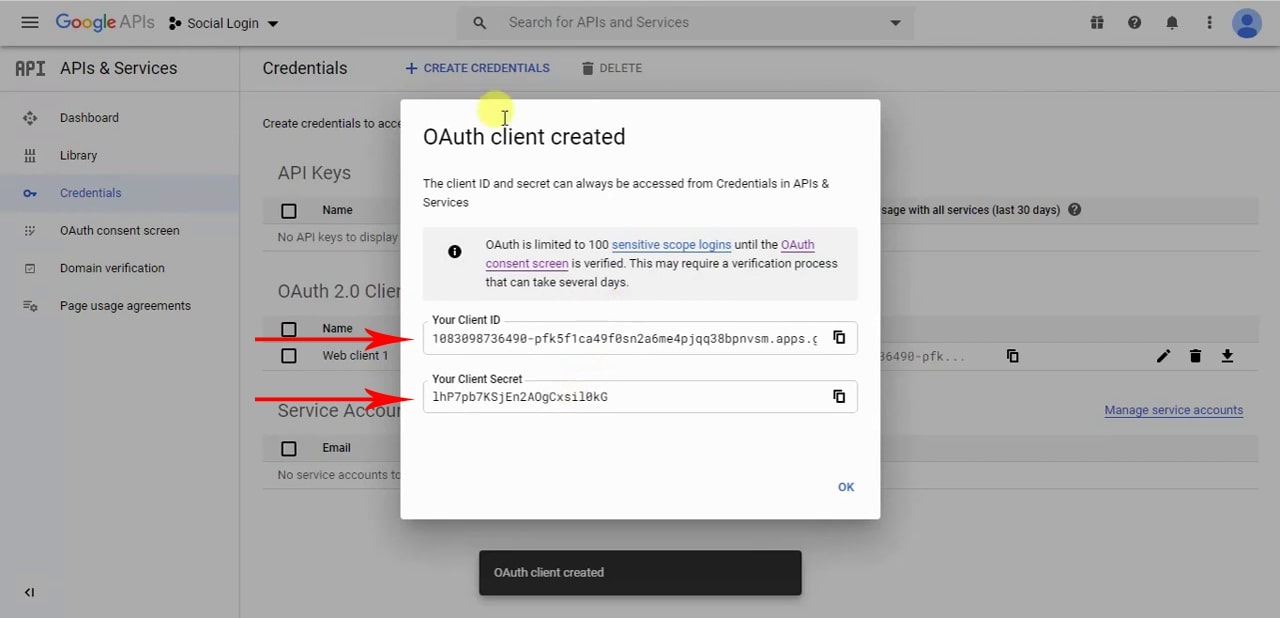
Step 5: We need Google Client ID and Google Client Secret by using Developer Console, go to Google developer console.
Step 6: Once you open the developer console there will be new project option we gonna create new project lets name it as social login then create the project.
Step 7: Our new project is ready now go to OAuth Consent Screen and then we select External click on create.
Step 8:
- Add an Application Name such as: Social Login.
- Leave the Application Logo empty.
- Add your support email address.
- Add Authorized Domain such as: websensepro.com.
- Hit Save.
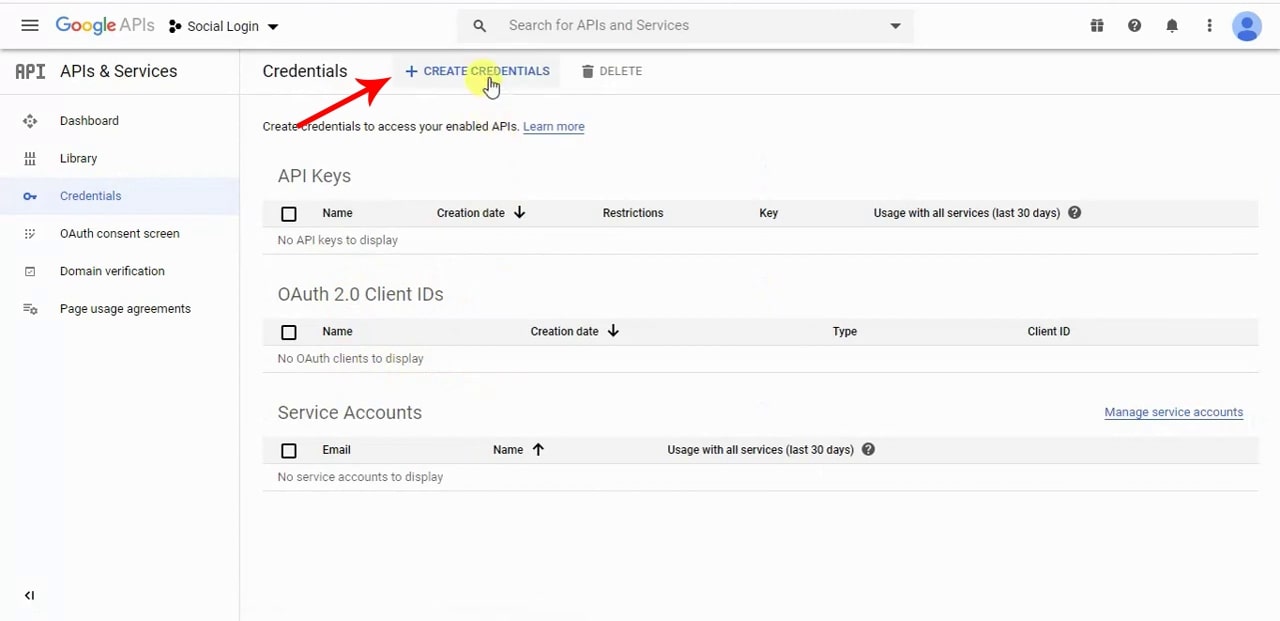
Step 9: Goto Credentials and now click on Create Credentials and then OAuth Client ID.
Step 10: Application type is > Web Application and then go to direct Authorized redirect URLs add your Website URL then click Create.
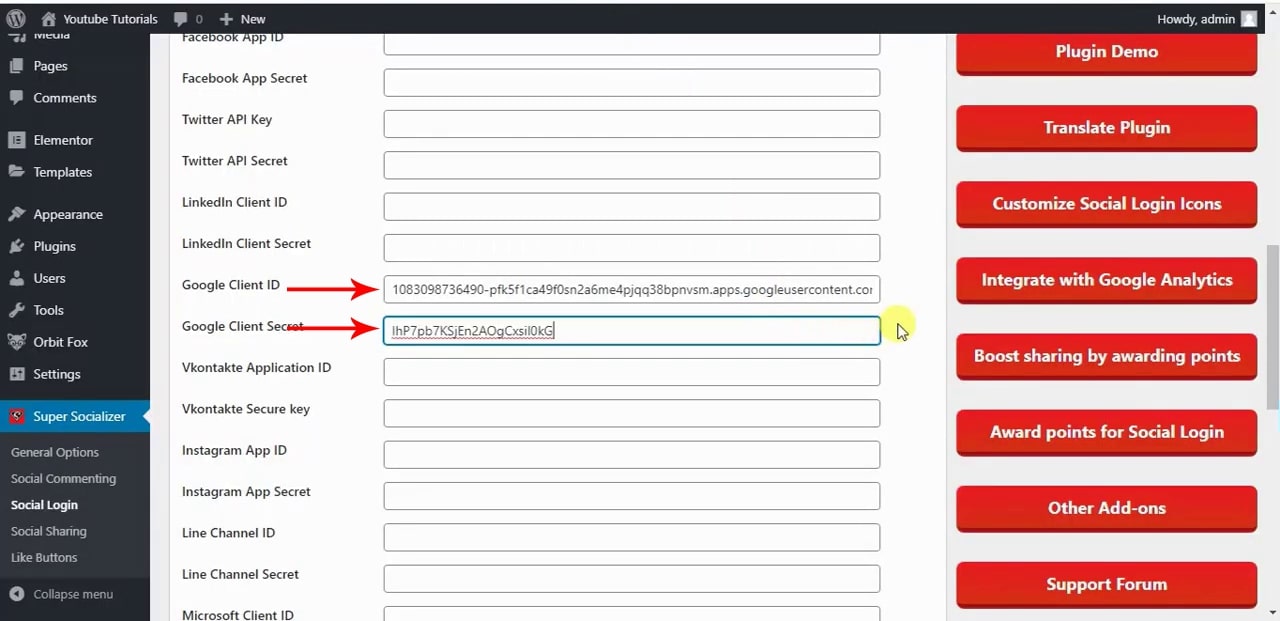
Step 11: Now we have Client ID and Client Secret Key Copy them.
Step 12: And then paste here and click on save changes.
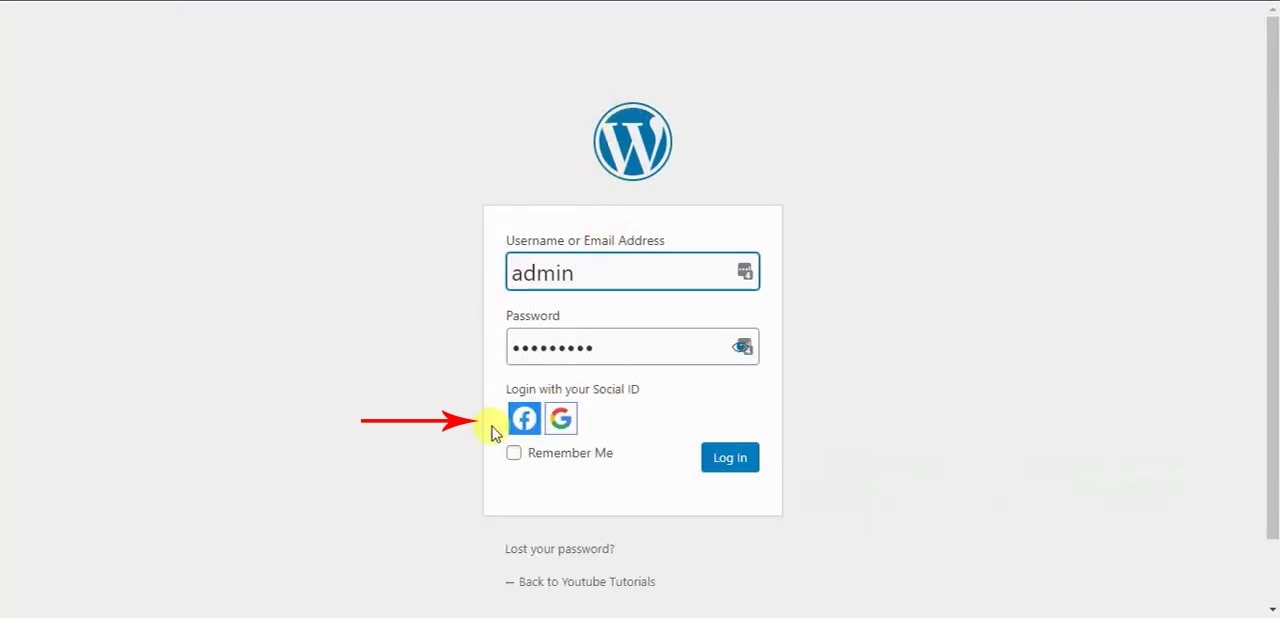
Once Setting Saved now try to login to your WordPress website using Google Sign in
-
Enabling in Product page
Let’s Enable Google login button to your checkout page .
Step 1: Go to Super Socializer > social login and then Advanced Configuration and then Enabled Social Login for WooCommerce when once done click on Save Changes Button.
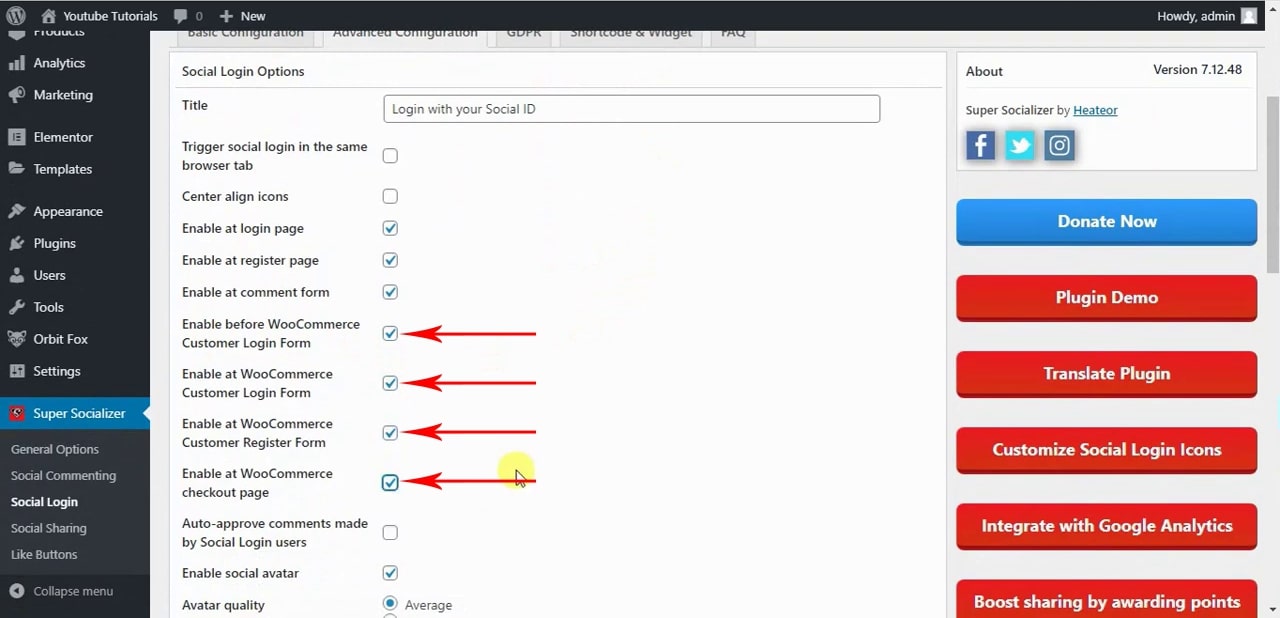
After all of this you will see Google Login Button on your Checkout Page.
Now we are Done with Google Login
-
Adding Facebook Login in WordPress
Step 1: Now go to Social Login and Enabled Facebook and then click on Save Changes.
Step 2: Please make sure you already login to your Facebook Account.
Step 3: Now open Facebook Developer Console, its developers.facebook.com.
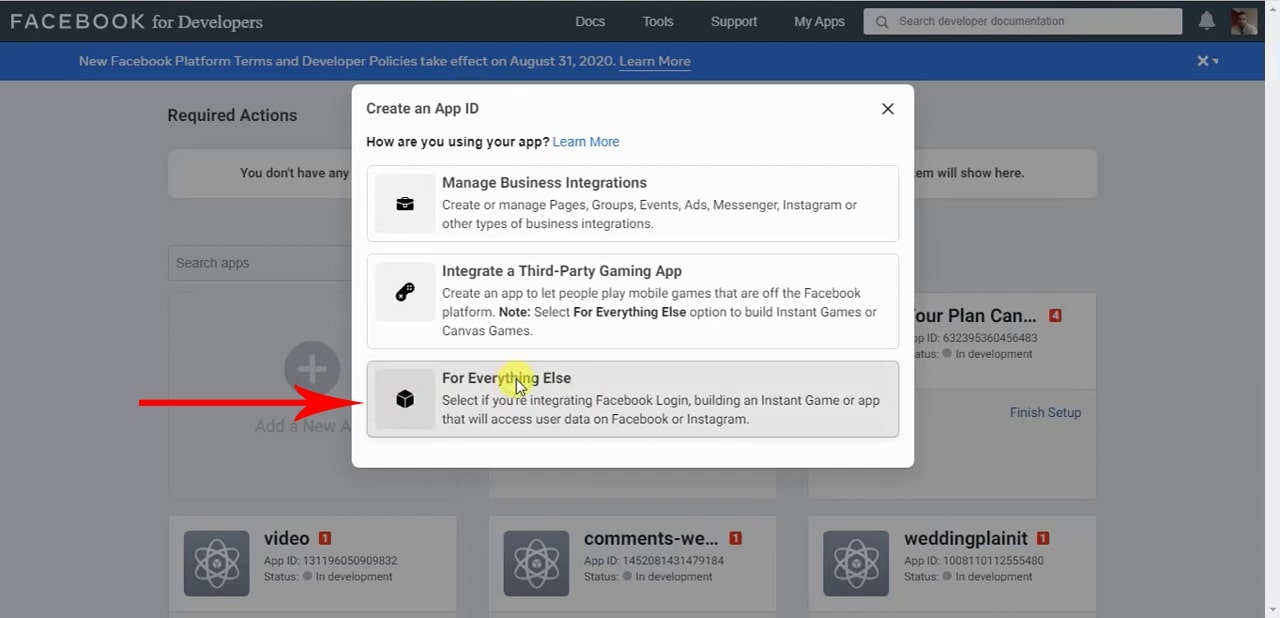
Step 4: Click on My Apps > Add a New App > Click on For Everything Else
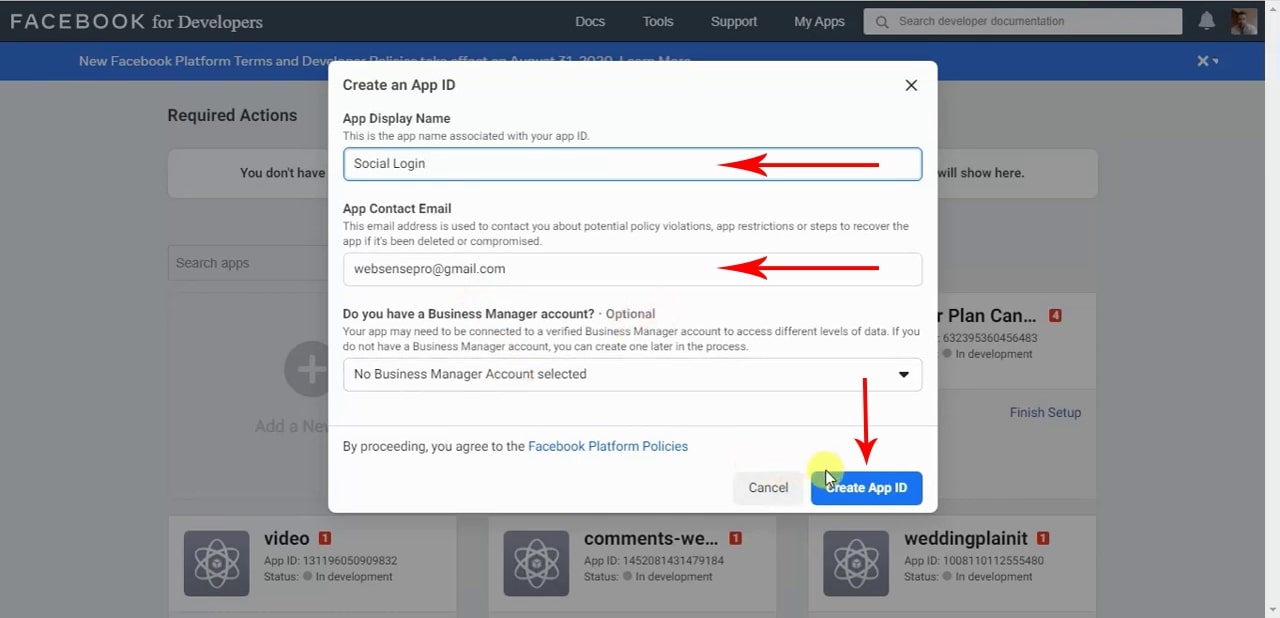
Step 5: After that Fill the given field , App Display Name, App Contact Email then click on Create App ID.
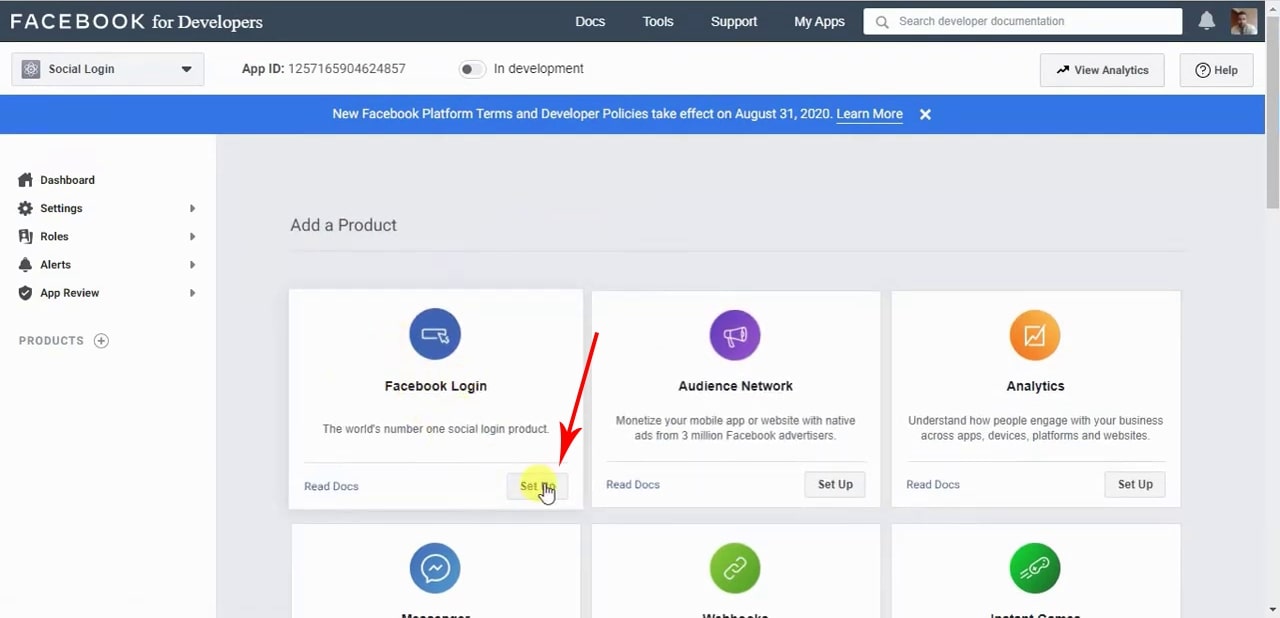
Step 6: Once you done you will see the Dashboard of Facebook for Developers.
Step 7: We are gonna click on Facebook Login Setup
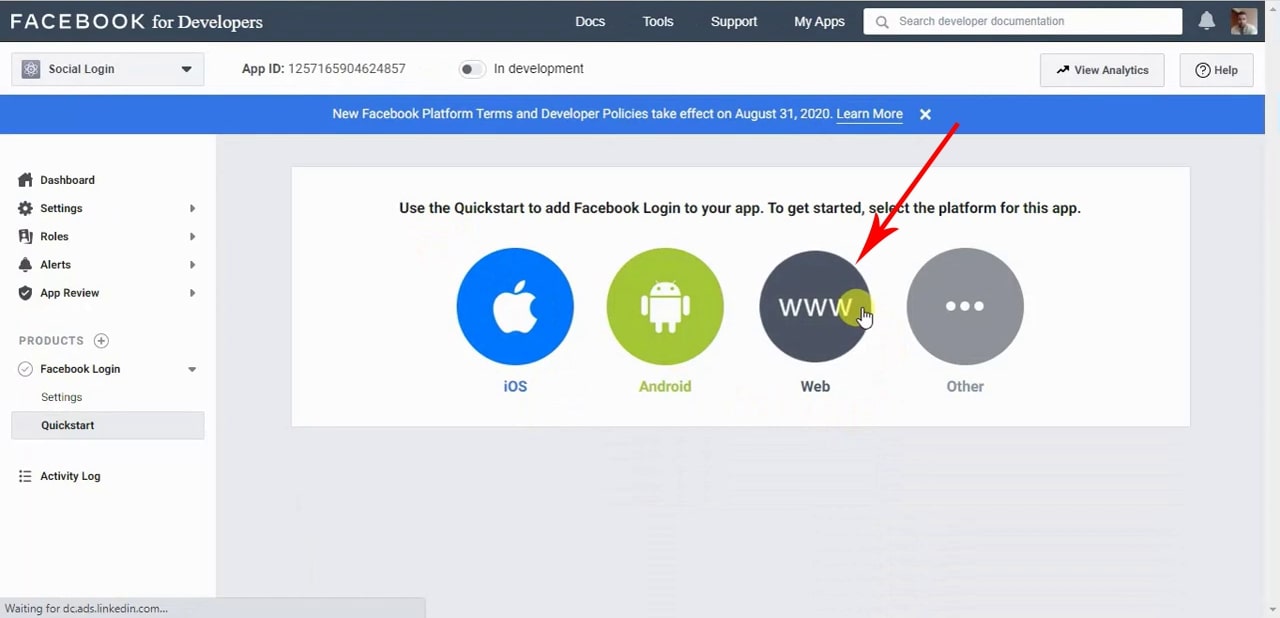
Step 8: And then we are gonna select Web
Step 9: Now we will add our site URL and hit save, once save go to settings > then Basic, add privacy policy page URL and then You can see our App Id and App Secret let’s copy .
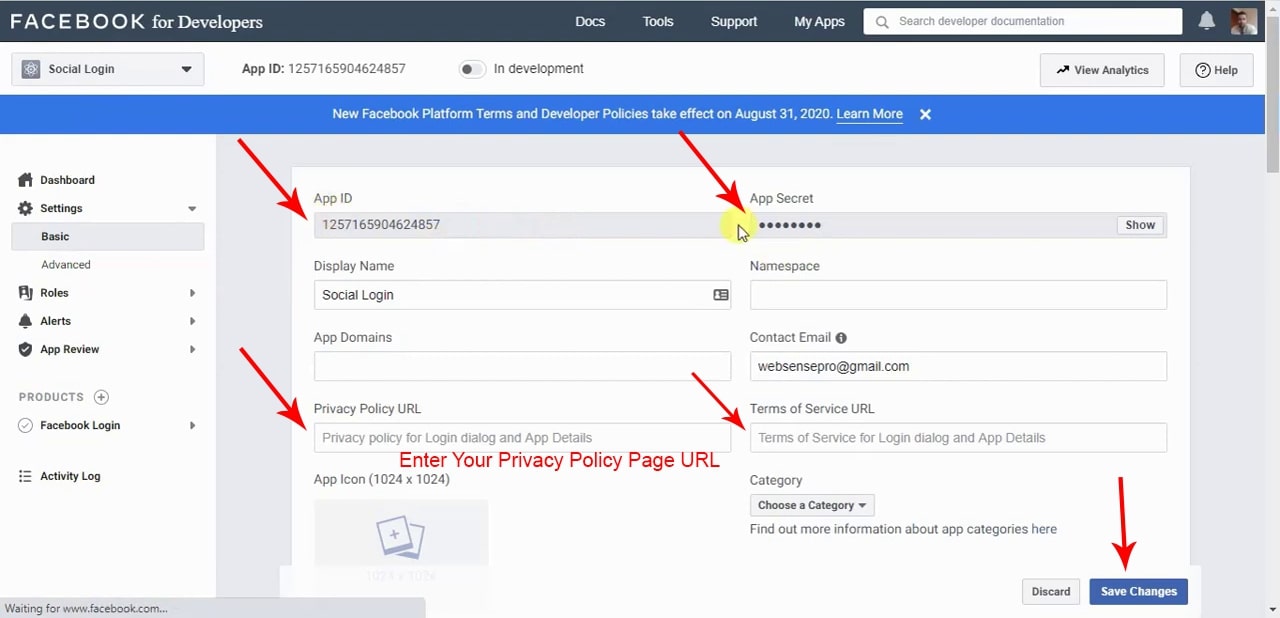
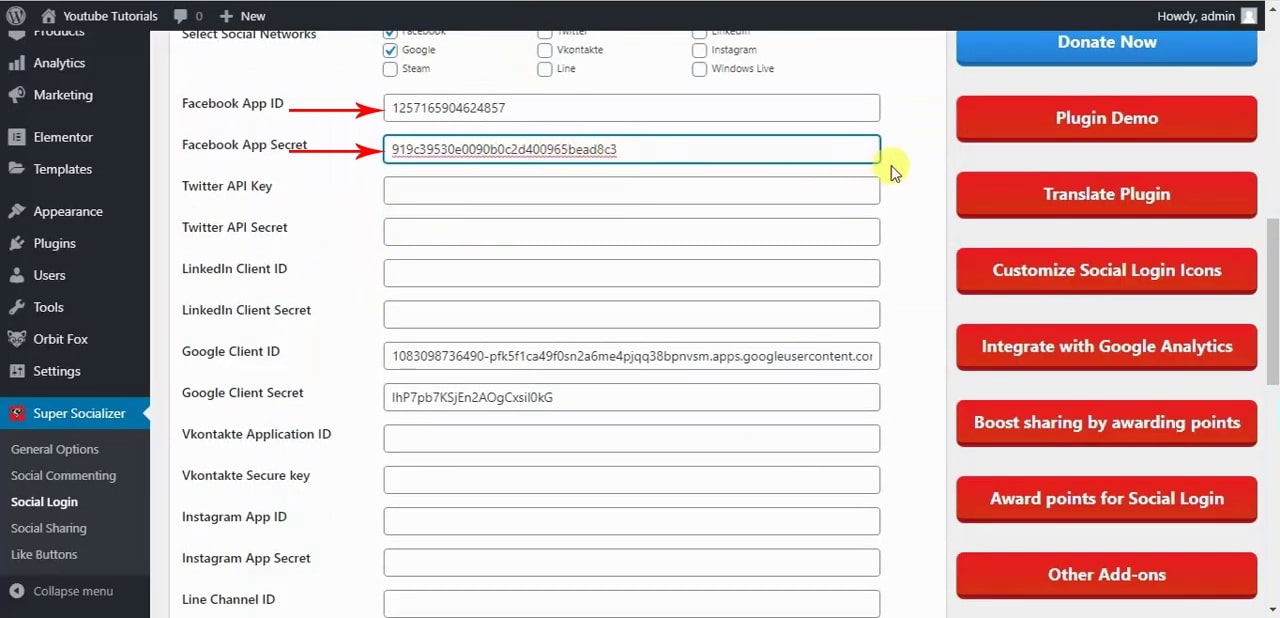
Step 10: Now pasted to you’re in plugin settings click Save Changes.
Step 11: You will get an error message on the top you have to copy a URL.
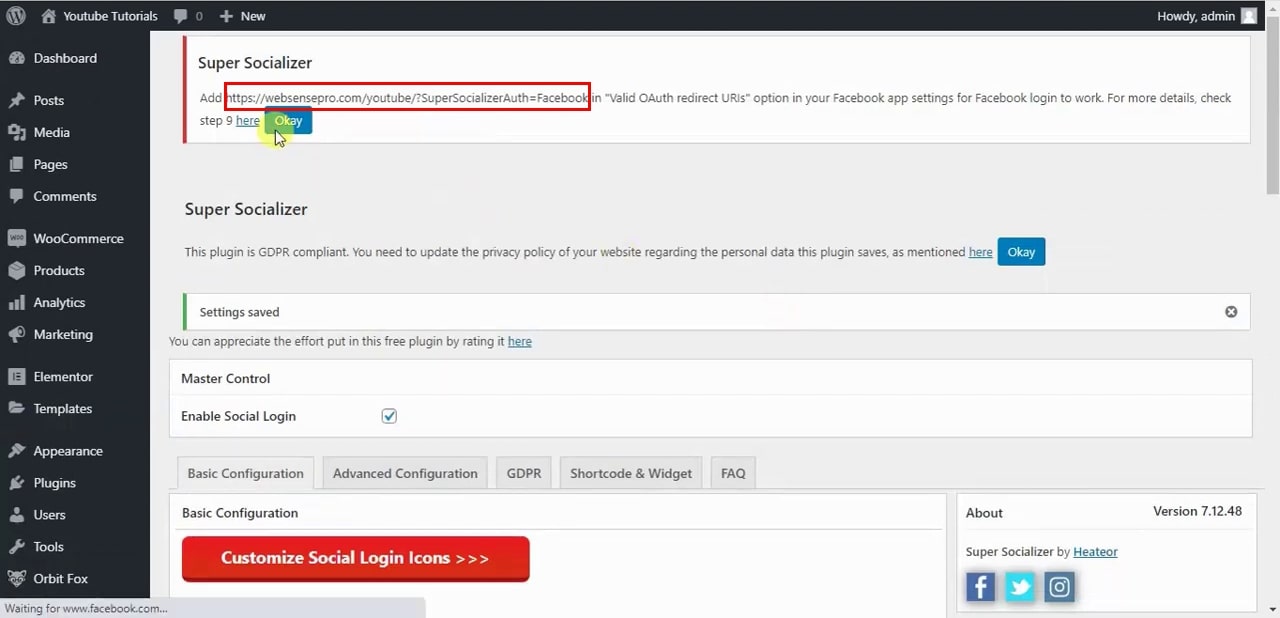
Step 12: And pasted in Facebook Login > Setting Valid OAuth redirect URLs in as given below.

Step 13: Once it’s done click on In Development and hit on Switch Mode.
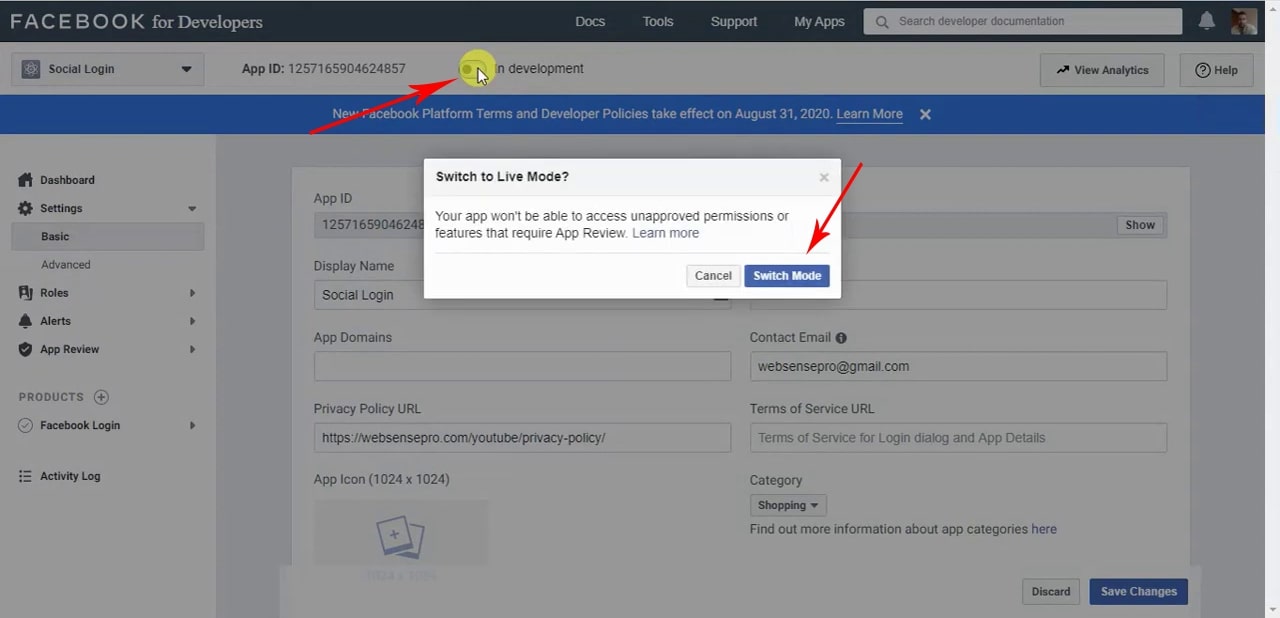
And here we go our Facebook App is Live. Now we gonna test Facebook login like to Google login , Once when you go to your Login Page you can see the Facebook login button.
If you are not tech savvy and looking to get some tech help for your website, contact us here.
