

First Step – Shopify Dashboard :
Goto Shopify Dashboard which will look like below:

Then click on “Online Store”
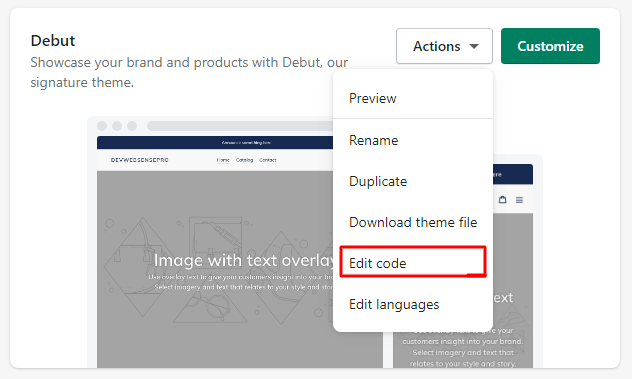
Second Step – Adding A Template By Editing Debut Theme Code :
In this step, we will go to the Code editing section for our Published Theme which is “Debut”. Before doing we suggest creating a “Duplicate” to save the original files so if we do something wrong on the code we can easily revert it back from the Duplicate Theme.
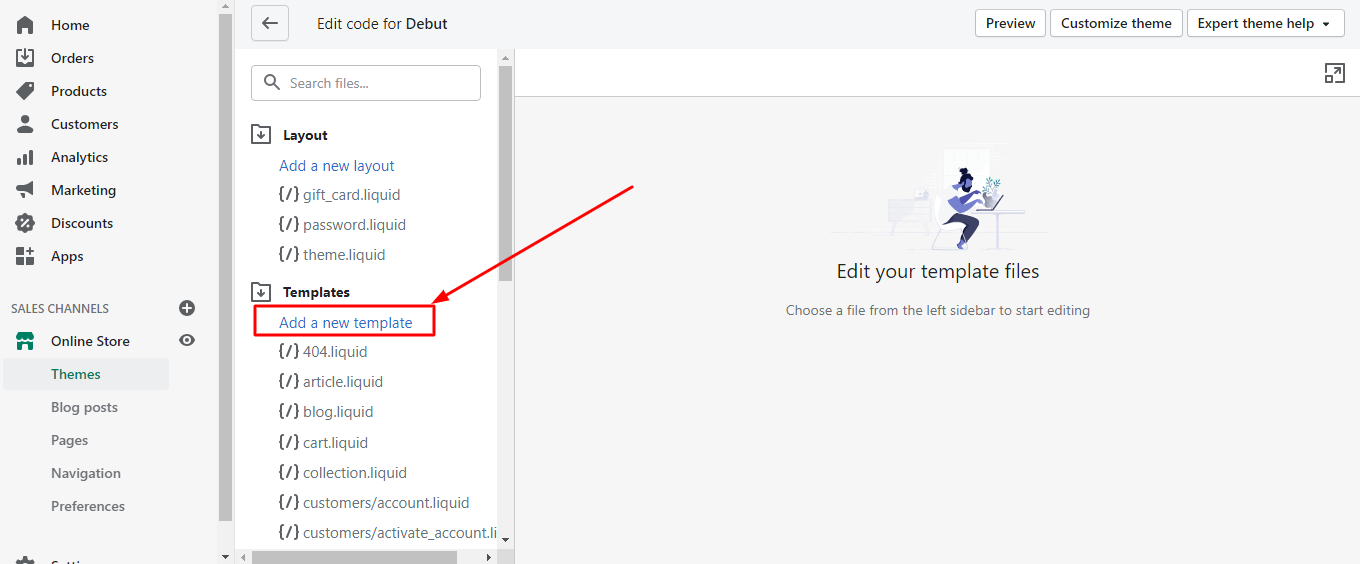
Third Step – Create A Custom Template :
In this step, you will create a custom template by clicking on “Add a new template”
After clicking, a pop will generate which will look like this
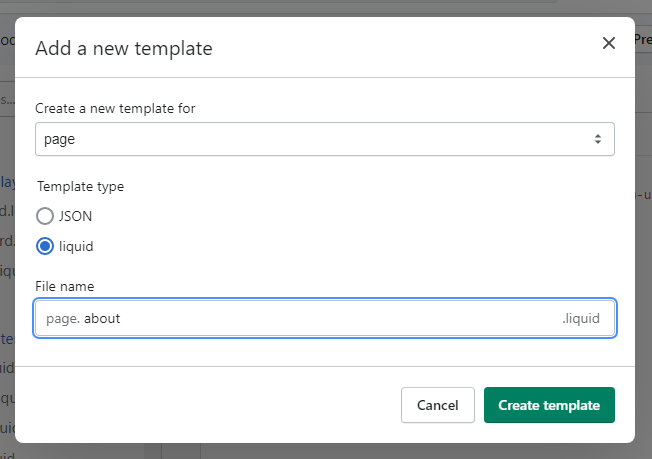
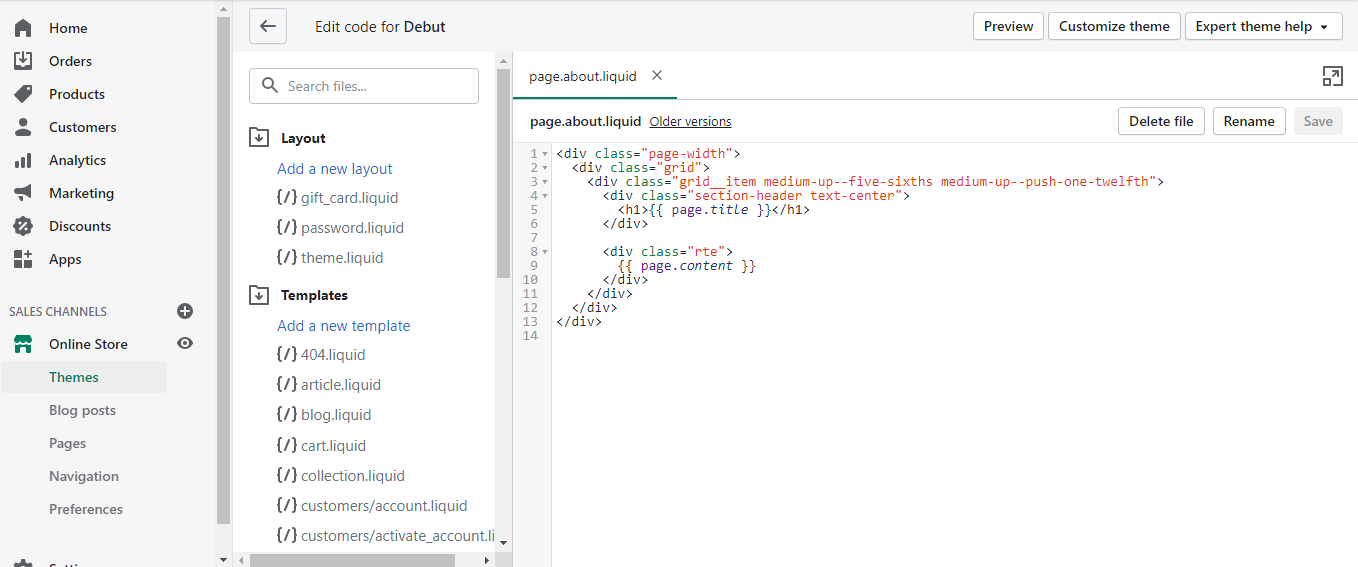
In the dropdown option of the “Create a new template for” select “page”, in “Template type” select “liquid”, and in “File name” set the name of the template for which page you want to create. We named as “about”. After creating template, the template will show this type of code
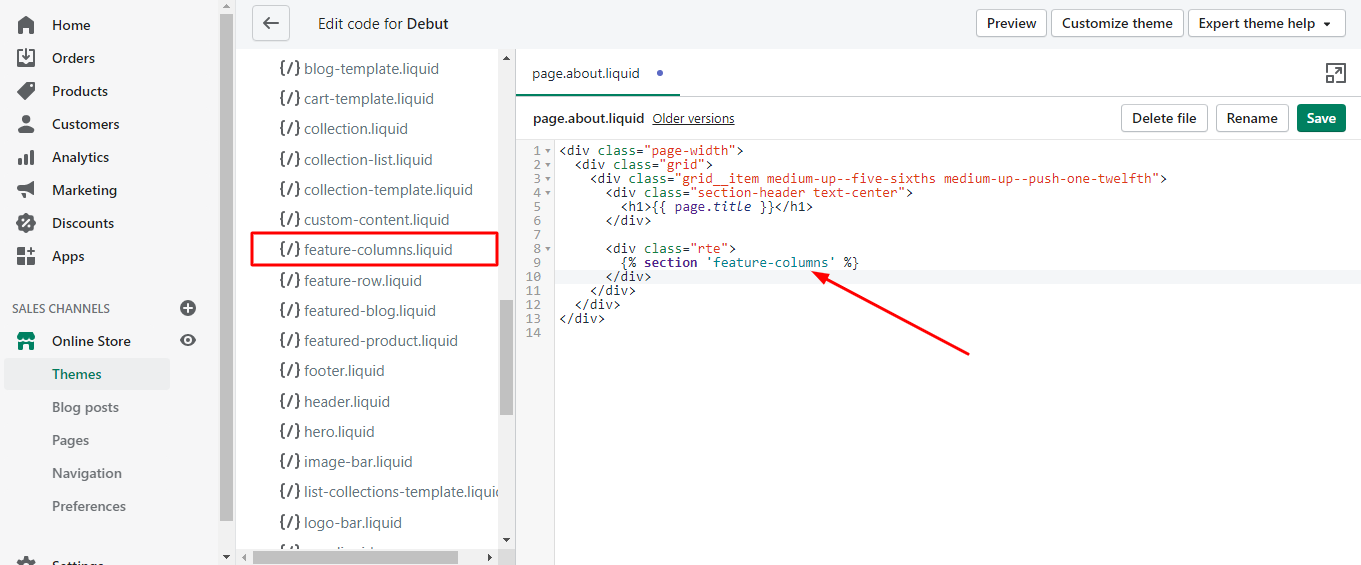
Fourth Step – Inserting A Code To Add A Section:
In template, use this code {% section '' %}, where {{ page.content }} exists. This code specifies that where to add a section on the page. In single quotes, we always define the “template name” for which you want to add. Here is an example in the screenshot below
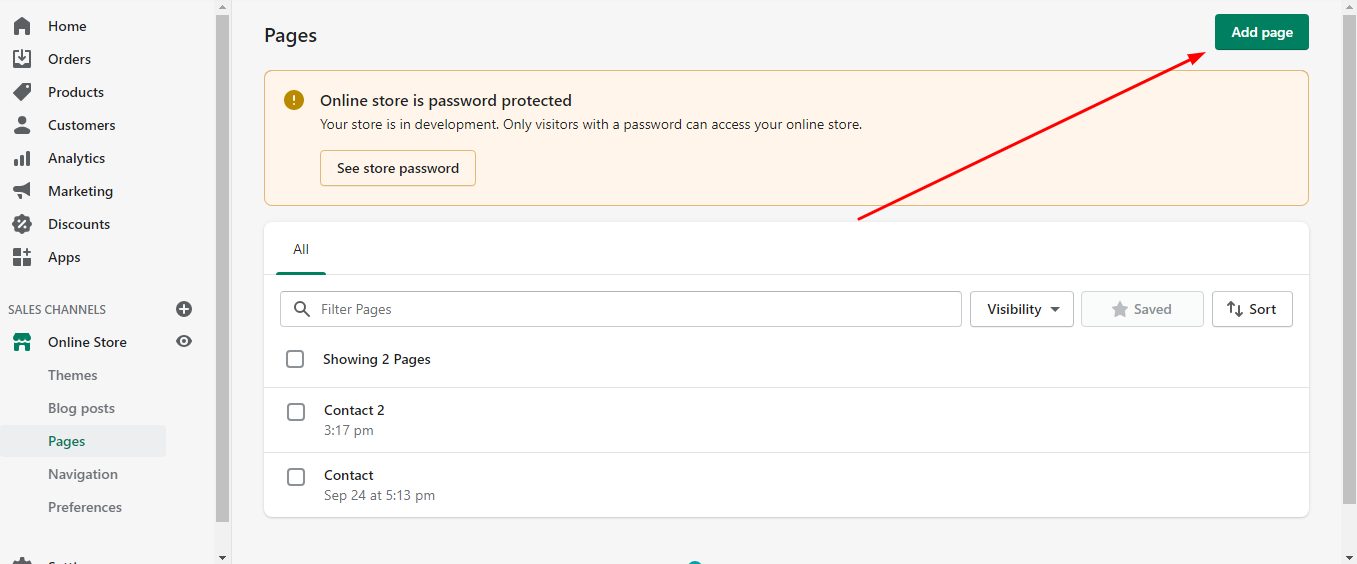
Fifth Step – Apply Template To A Page:
After creating the template and inserting the code, create a page on which you will apply this template. For this, On the left side of dashboard options, click on the “Pages” tab, and a page.
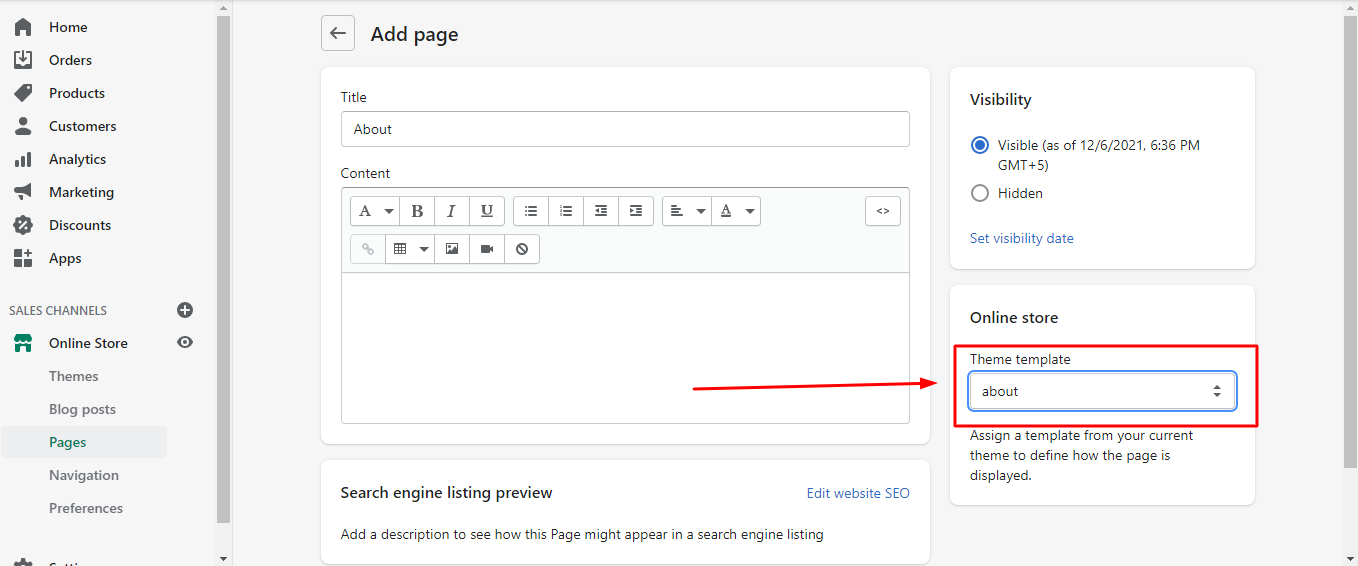
After adding the page, set the page name & select the theme template on the bottom right of the screen which you have created and click “Save”
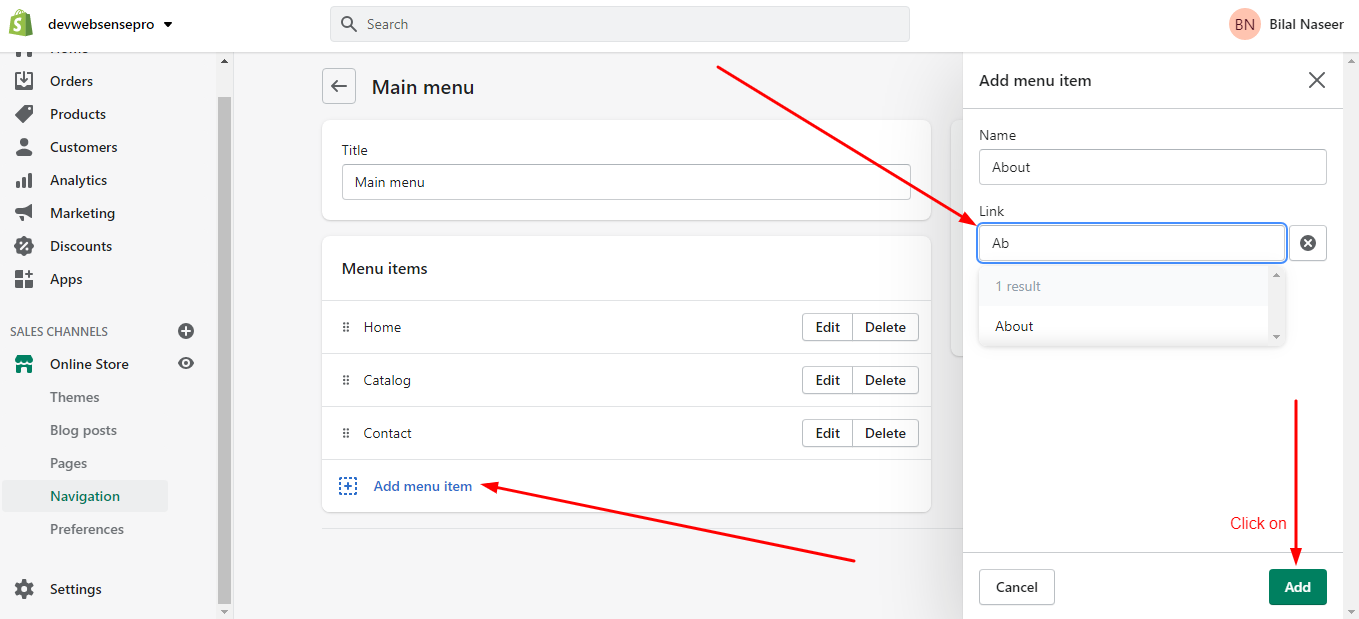
Sixth Step – Add the Page To Navigation Menu:
After creating the page, add the page to the menu by clicking “Navigation” from the left side of dashboard options then, click on the main menu
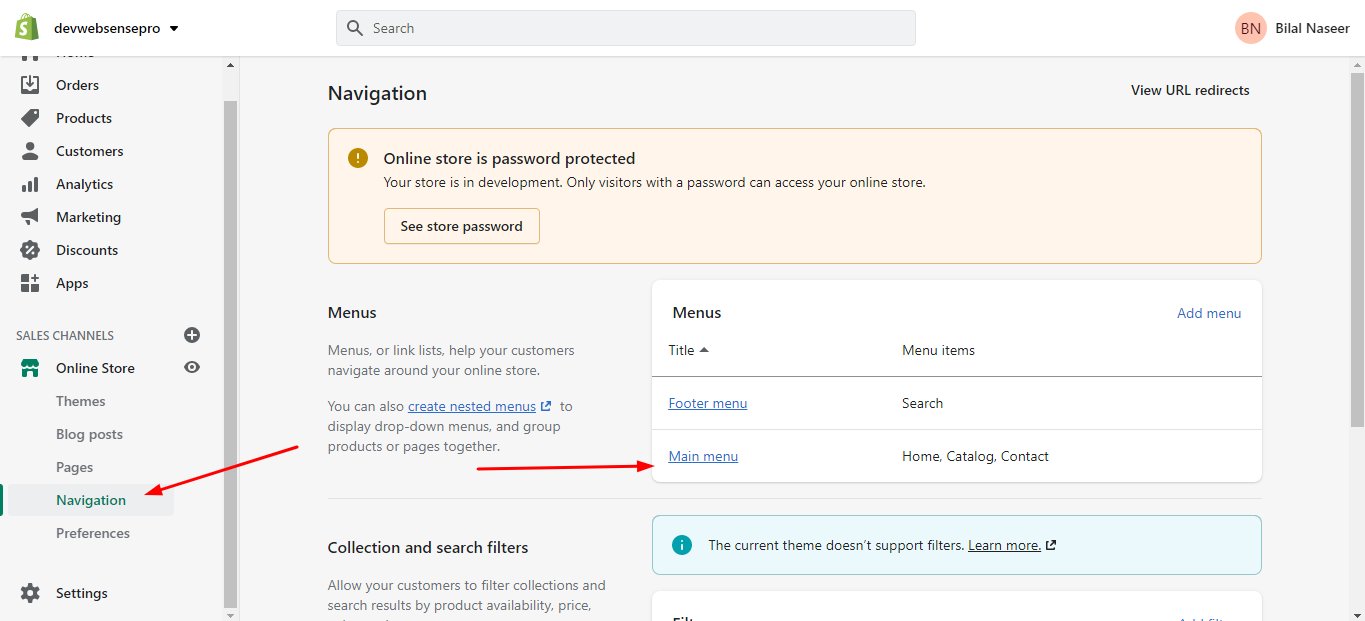
After creating the page, add the page to the menu by clicking “Navigation” from the left side of the dashboard then, click on the main menu and add the page
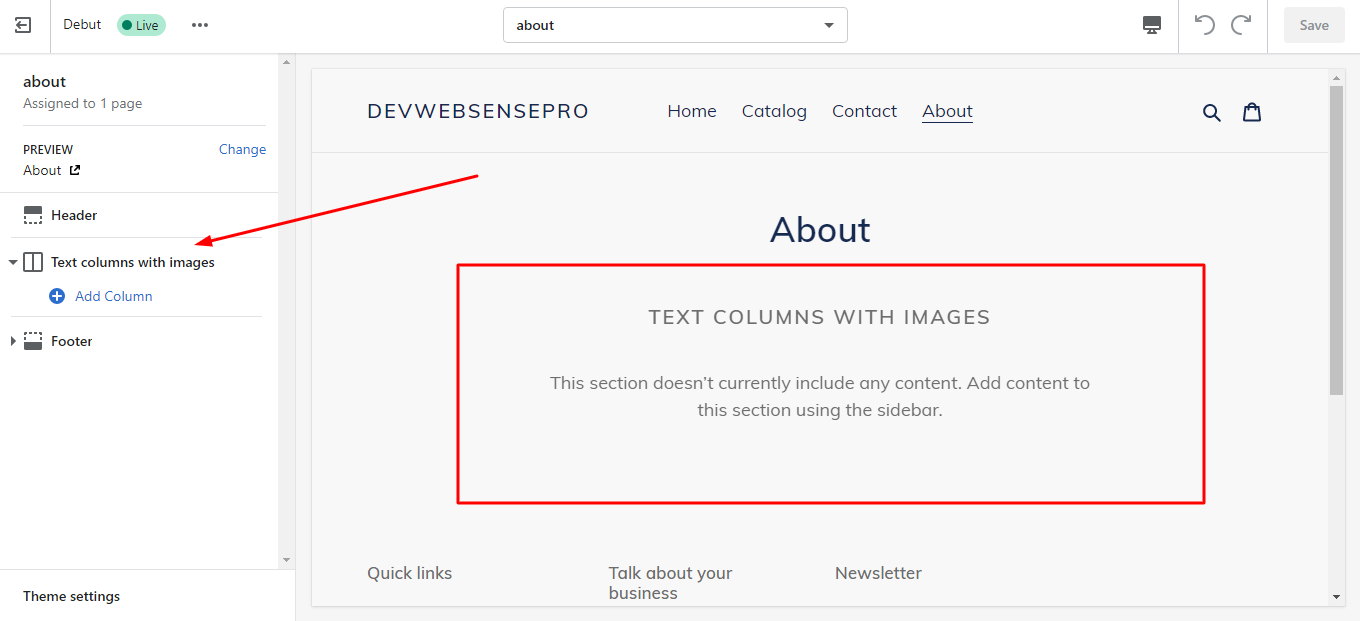
The section is now added to the “About” page. You can add images and text from the theme options as shown below


4 thoughts on “Learn How To Add Sections To Pages In “Debut Theme””
this tutorial was awesome, THANK YOU! Now I need to learn how to use the same web part multiple times without it duplicating the content across pages…..eeek!
Glad it helped
great tutorial, but having issues. anytime i add a picture or change the text to what i want, it loads but then when i save it reverts back to orginal. its like its not accepting anything besides the default info
This is because same section can’t be used twice you will have to copy .liqiuid file and rename the section to use it again