

Today in this article I am going to teach you how to move wordpress to new server. For example you want to move your wordpress site.
olddomain.com ![]() newdomain.com
newdomain.com
Now first you need following from olddomain.com:
- wp-content folder
- MySql Database
Download wp-content folder:
To do so I would prefer to use FTP Client in my case I am using FileZilla which is free FTP Client. Take a look at screenshot below for FileZilla.
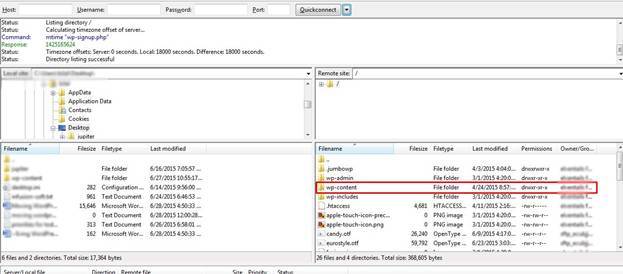
Right click over wp-content and click download from options.
Download MySQL Database:
WordPress contains all of its text information in database means it is the important part for moving wordpress to new server.
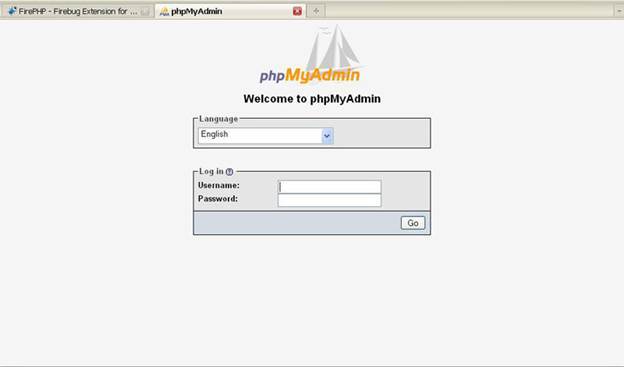
First you have to login to PHPMyAdmin through your hosting, take a look at the screenshot for PHPMyAdmin interface.
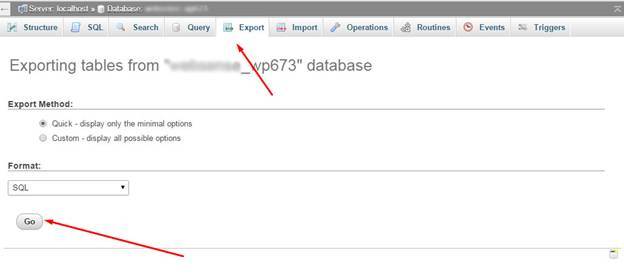
Login information should be in wp-config.php file of your wordpress, after logging in click on Export than GO button in your screen, see screenshot below.
Now within couple of minutes you should have your database file in your hard drive. After completing these steps we are done with downloading our wordpress site.
Moving WordPress To New Server:
Now when we have all the files ready we first need to create clean wordpress installation in your new server, if you are using Godaddy, hostgator, bluehost or any of the hosting company they all have one click installation system for WordPress.
Uploading wp-content Folder:
Once your clean installation of WordPress is ready you have to upload wp-content folder via same procedure and delete the old one as we did earlier through FileZilla.
Uploading MySql Database:
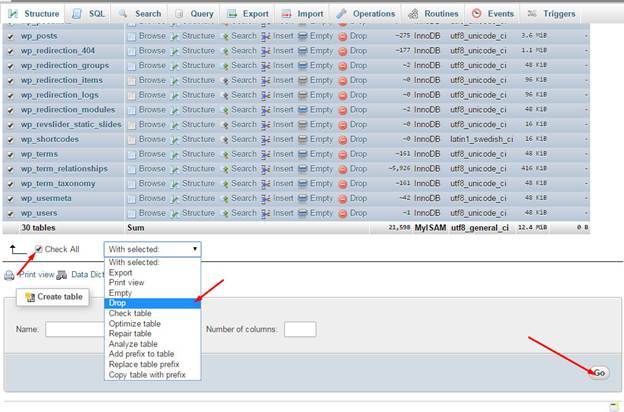
After uploading wp-content folder goto PHPMyAdmin and delete all current details, please see screenshot below for better understanding.
After deleting all tables from WordPress database we will upload database which we download earlier and to do so we will click “Import” and upload file.
When file is uploaded we will change URL in database by going to options table, please see screenshot below.

By clicking on Edit button change URL to current domain in our case it is newdomain.com as there are two Rows in the table please see screenshot below to change URL for second row.

Now we have everything ready in our database.
Updating wp-config.php File:
Now we will add following code in our wp-config.php file to make sure everything works fine in our new installation.
define('WP_HOME','https://newdomain.com');define('WP_SITEURL','https://newdomain.com');
Note: we are using newdomain.com as an example in your case URL for the new host will be updated.
Now we are all set with moving WordPress to new server
Final Step:
You will notice one thing when you will visit your WordPress on new host that some of the images are broken or website is not appearing as it was before to fix that we will do the following:
- Install GoLiveUpdateUrl’s plugin in your new wordpress installation
- Update URL’s through this plugin, see screenshot below:
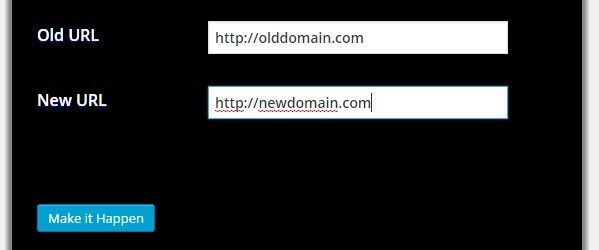
In Old URL we will add source website URL in our case we have added olddomain.com and for new URL we will add destination website in our case we have added newdomain.com. After clicking “Make it Happen”, everything should be ok and your website will look as it is as it was before.


2 thoughts on “Moving WordPress To New Server”
Nice & very helpful article. Thanks
Thanks for providing feedback