

Whether you’re new to the world of web design or an experienced designer with tons of projects under your belt, you surely agree that website design isn’t the easiest job in the world. It’s kind of like a balancing act that doubles as a feat of juggling — if any individual element is missed or passed over, the whole thing could come crashing down.
As designers, we have one ultimate goal: creating a cohesive, functional, effective site that we can then hand off to our client with confidence that they’ll be happy with the finished product. A successful project is one that gets the job done as intended, on budget, and within the projected timeline.
The Elements of a Great Web Design Process
With so many elements at play, however, it’s critical that nothing slips through the cracks. A good designer needs a good game plan for development and execution. That’s where the idea of a web design process comes in.
A web design process is an outline of the steps necessary in order to reach a goal. Designers may have larger design processes that encompass the entirety of designing a webpage, and if you have the kind of mind that can handle lots of factors at once, that may be perfect for you to follow.
On the other hand, design processes are also excellent tools for breaking down a large goal into smaller, more manageable tasks, with detailed steps for each new move.
For a designer, these breakdowns are incredibly valuable because we end up doing the same tasks over and over — and following a roadmap makes it easier to ensure that nothing slips through the cracks, as well as cutting down on the amount of times you do the same work over again. Design processes are the design workload equivalent of templates; it’s not exactly “lather, rinse, repeat,” but it is “design, adapt, repeat.”
Ultimately, what makes a web design process so useful is the standardization of steps that should be taken for each major section of web design. While different projects require different elements, web design processes can be used and adapted for any individual project.
Here are seven simple web design processes that can be followed to achieve a successfully completed project.
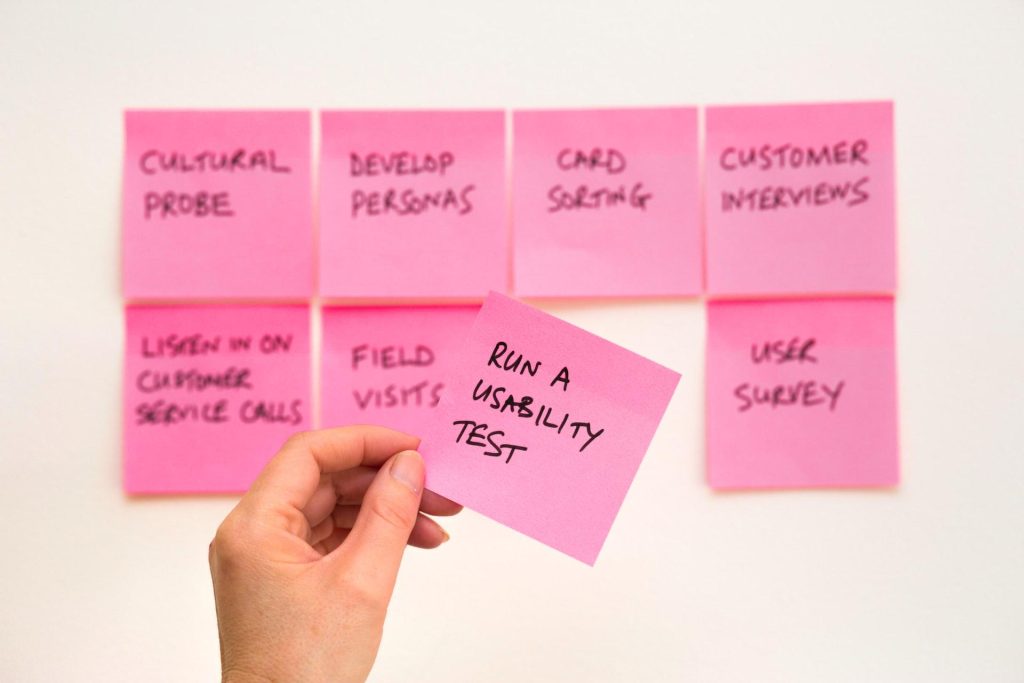
Research and Discovery
When designing a website for a client, you’ll enter into the project with a set of goals and requirements. This first simple web design process focuses on getting from the introduction of the client to actually starting work on the design itself.
With this set of seven directives for R and D, the most important key is communication between client and designer.
- Receive and compile client documents, including timelines, goals, budgets, and deliverables.
- Analyze the information and set a timeline and budget for your work process, based on your resources, skill set, and schedule. This will also include resources such as stock photos and video, fonts, and any tasks for which you may need to use a third party or another resource, such as the logo designer or content creator. When creating your logo design avoid mistakes that might end up damaging your brand.
- Analyze the intended target audience based on the website’s purpose, location, and reach.
- Conduct market research regarding the demographics of the audience and the client’s competitors
- Draw up a project charter with agreed-upon goals, details, budgets, and timelines, to refer to during the project.
- Discuss any and all questions and concerns before actually starting work.
- Draw up and sign the contract for the project
Planning And Outlines
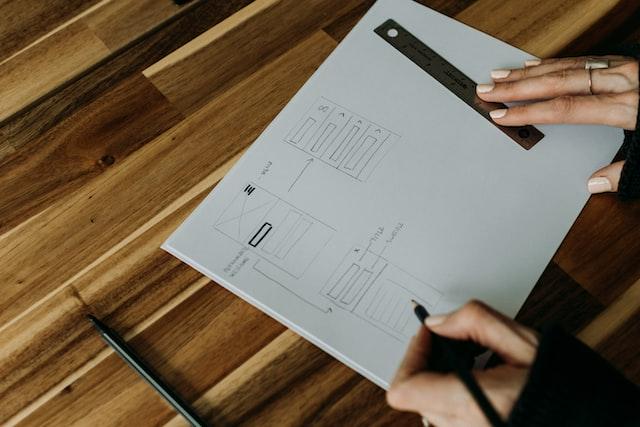
The next step for most designers is to draw simple layouts to serve as the basis for more complicated wireframe design, which is the third design process. Not all designers prefer to use the hand-drawn design method, but it can be a useful step in seeing what does and doesn’t work before you put a great deal of time and effort into the design.
- List the necessary information that will be included on the site, as well as requested features. Break the information on a page-by-page basis site-wide to get a good grasp on your information architecture.
- Analyze the balance of information to avoid loading any one page too heavily, especially if there will be a lot of photos and videos to include.
- Draw a basic layout for the main pages. Some designers like to work with Post-Its or other small blocks of paper so they can be moved around to try different layouts without redrawing. Or you may want to use a whiteboard. Focus on organizing blocks of content in a way that makes sense to the target audience.
- Write out the navigation hierarchy and develop your site map.
Virtual Wireframe Design
With a basic idea of where to go from here, it’s time to start developing your digital mock-up. There are several different software programs that can help with this, but it ultimately depends on your preference.
The purpose of the wireframe is to establish whether your design will reach the goals set by the client. Does it include all the client requests, answer questions the users will have, and is it easy to understand?
- Using the wireframe software of your choice, start to create a layout based on your website plan. Adobe Illustrator is a favorite for many designers because it’s relatively easy to use and switch elements around. Wireframe.cc is another handy online tool that lets you create wireframes right in your browser.
- Use placeholder blocks for written content, photos, and videos. If you have stock photos chosen already, you may want to include them for a clearer understanding of how the site will look when it’s done, but that can also wait until the next design process.
- Remember that simple wireframes are the best. This is just a basis to build on, not the site itself. Don’t add in too many details that may need to be redone later on.
- Once you have your wireframe ready to be viewed, bounce it to your colleagues or to the client for feedback. You can use resources like Dropbox and UsabilityHub to share your wireframe and compile notes and feedback. Then tweak as needed, get approval, and get ready for the next set of steps.
Prototyping
Now that you’ve got the bones of the structure in place and approved, it’s time to start fleshing it out with the actual creation of the site’s prototype.
- Decide how much coding you need to include and what features need coding. It’s entirely possible to get away without much coding knowledge at all, but it can be useful for specific features that need to be developed, such as unique navigation systems or interactive elements. If your design requires these, this is the time to make sure that you have coders working on developing the elements for you, if you’re not doing them yourself.
- Choose your prototyping tool. InVision is the industry leader, and it isn’t difficult to use, either, though there is something of a learning curve for some designers. UXPin is another good choice.
- If possible with the software you’ve chosen, export your wireframe directly to the prototyping tool to build on what you’ve already established.
- Add in details and content, including stock photos and any written content that you already have ready to go. If you’re short on content, build in placeholder blocks.
- Add in any coded features when they’re done.
- Make and execute UI design decisions such as font size and type, color, use of negative space, etc. These will likely be included in the project charter or the creative brief from the client.
- Run through the functionality of menus, features, links, etc. and adjust as necessary.
Content Creation And Placement
Websites are only successful if they reach the intended goal, and usually that goal centers on providing information to the visitor. Two basic elements are necessary in order to ensure that this goal is reached.
- The information must be included in the content.
- The content must be readily accessible to the viewer.
That’s why I’ve included two aspects to this particular design process, along with seven basic steps.
- Create and/or curate the content that will be included on the site. This includes both written content and visual content, via photos, illustrations, infographics, and videos.
- Content creation is a skill that usually requires a third-party creator who specializes in content, written or visual. Compile the information that must be included and work to ensure that the delivered content hits all the requirements.
- Before you upload and layout the content, it’s a good idea to have a trained editor or proofreader go over it, especially for written content and infographics. Typos can often slip by.
- Compile any stock photos or client-provided visuals, including company logos.
- Include the visuals and written content in the appropriate blocks within your prototype. Use keywords for meta descriptions and make sure to optimize for load time.
- Follow best practices for the hierarchy of font size and type. Software like Yoast is helpful for ensuring that the content will do well in SEO.
- Ensure that the content is legible and readable against the background. Aim for at least three to five pieces of written content so the site doesn’t look too brand-new.
Feedback Loop
With the prototype in place, it’s time to start really putting the website to the test with the feedback loop.
Remember, as I mentioned before, communication is really key for a successful web design project.
- Check the site for usability, legibility, and effectiveness yourself.
- Have a proofreader comb through the content.
- Make sure your prototype is accessible through the development software or tools like Dropbox, and then start the first round of feedback from colleagues and client.
- Once you receive notes, make sure to discuss any questions you have before making the changes. It’s really important that you and the client are all on the same page.
- Adjust as requested, and send back for feedback again.
Launching the Site
- Conduct final checks on the site before launch, including what it actually looks like on a browser and page loading times. Go over any missed opportunities for optimization.
- I advise a final check on the content itself, ensuring that everything is professionally done and communicates the purpose of the site adequately.
- Work with pre-launch marketing to ensure good use of SEO keywords and on-brand messaging.
- Once the site is live, do another round of tests to check that everything is loading correctly and with a good average load time. Tools like Google Analytics and GTMetrix are helpful for this.
- Be ready to adapt, change, edit, delete, and maintain the site throughout its infancy. This is especially important if the site is launched with a big fanfare and a lot of traffic; never assume that everything will just run smoothly! There have been too many examples of what happens when a new website crashes and isn’t brought back online quickly.
Every new website design project has its individual quirks, features, and needs. As you continue to build your career as a designer, you’ll keep discovering new and better ways of handling the design process.
These seven simple web design processes are compiled to provide a template for those adaptations, giving designers a platform from which to launch the next project, and the next.
Author Bio
Tarif Kahn is Head of Design at Logo Design who loves sharing his diversified pool of knowledge in graphic design, web design and development, and print design. He enjoys experimenting with new technologies and has a knack for photography. He can be found tweeting at: @kahntarif

